Tuesday, November 15, 2011

Chicken Pockets

This has been the crazy week I look forward to all year! I coordinate a bazaar here in Canby, Or and it is fantastic. Even though I dread having to put out all the signs, when I walk into the room full of artisans it is all worth it. The creations they make are of the highest quality so hard not to buy everything!


Now that the show is over, I can relax (for a couple days, I am coordinating the church talent show this year now) and finally put up one of our favorite dinners.

We love this dinner for it's versatility, and how easy it is to make. You can call it Chicken Pockets, Chicken Puffs or even Chicken envelopes, we call it delicious.

Take any left over chicken from your fridge or cook 2 chicken breasts in the crock pot with half a bottle of Italian dressing and enough water to cover the chicken for 4-10 hours. This night we cubed chicken and cooked it in the dressing and water on the stove.
Throw the chicken into a bowl with 3/4's of a cube of cream cheese, 2 tablespoons butter or margarine, 1 tsp garlic powder, 1/2 tsp onion powder. Mix with a hand mixer until chicken is shredded and incorporated.
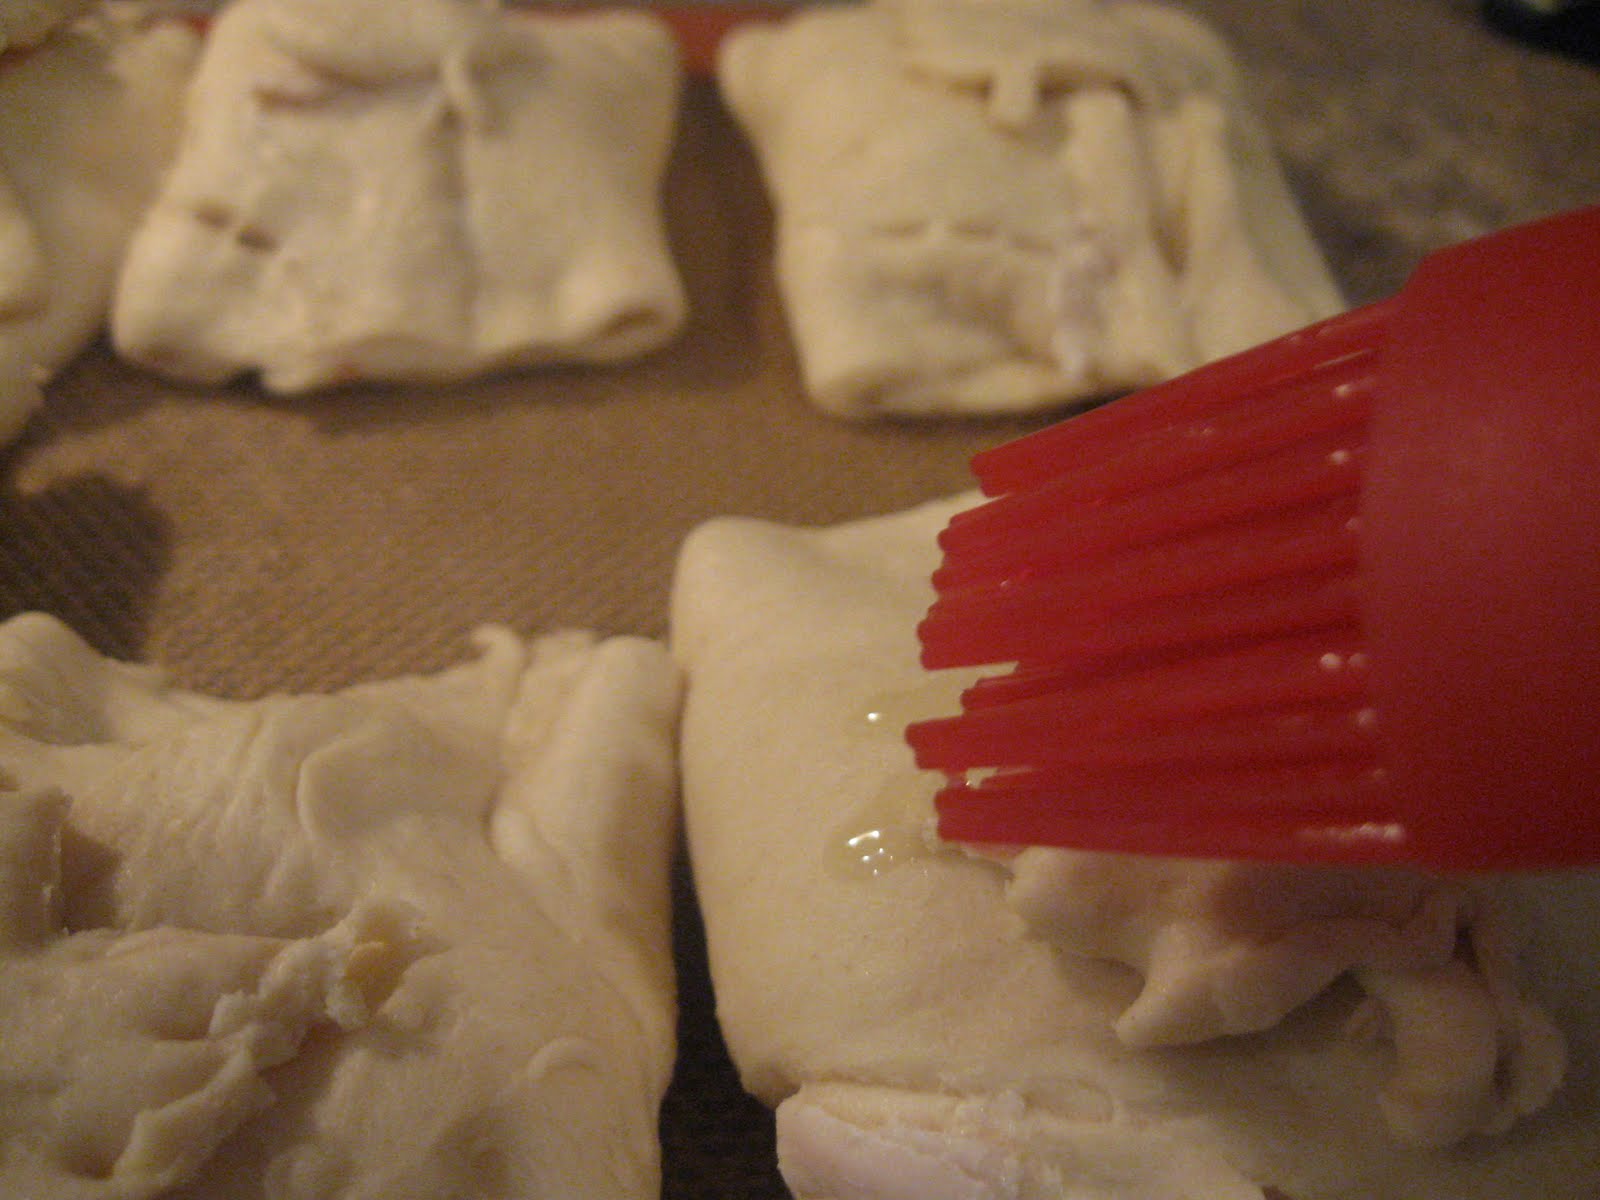
Lay out 2 packages of refrigerated crescent rolls. Pinch the middles of 2 triangles to create 1 square. Fill each square with 2 Tbl of the chicken mixture.
Fold the centers together and then pinch the ends up. For this night I used a leaf cut out and left the last square of crescent roll to make leaf cutouts to use on the top.
Melt some butter and brush the tops with it, you can season the top with bread crumbs.
Arrange on a cookie sheet and put into a preheated 350 degree oven for 12 minutes.
For a quick weeknight meal, this is my go to recipe. Hope you enjoy! Do you use this recipe with any variations?

Linking to these great parties:

Sunday, November 6, 2011

Thanksgiving Countdown

3 years ago my most gracious Mother-in Law gave me a Cuttlebug for Christmas. It has been my trusty sidekick for all of my paper crafting. But now it is time to say goodbye. With half a tear in my eye I purchased a Big Shot from my last Stampin up party. To cover a bit of the cost I put my good ole' Cuttlebug up for auction on Ebay. Sigh. This is the last project we got to do together!


It starts with this free printable at Tip Junkie. If you have not checked this blog out yet, do yourself a favor and head over there (after you finish reading this of course). It is limitless ideas for parties, crafts and more. I decided to take the hard way and cut each letter and number out with the Cuttlebug. My 2 year old was happy to help turn the crank. I then glittered each letter and left it over night dry. When I woke up, I wasn't feeling it. It was way too much work. So I grabbed a bottle of Stickle glitter and went to town on a plain one I printed out.


I loved the result. I had to finish what I started though, so now I have 2!


One for us and one to give to my loving Mother-in Law! Fitting that I pictured them with the flowers she brought over for the Stampin Up Party. I framed them in some cheap IKEA frames. You can use dry erase pins on the plastic or glass in the frame to mark you days down and add what you are thankful for.


As you can see my darling 6 year old decided he was thankful for Mommy. All that work was well worth it to see that.
Linking to these great parties:

Thursday, November 3, 2011

Favorite past bazaar items

Are we all starting to think Christmas now?! I start thinking Christmas in July since I run a bazaar here in Canby. Shameless plug: Check out St. Patrick's Holiday Craft Bazaar Nov 12th 9am-4pm and Nov 13th 9am-2pm. 498 NW 9th St, Canby, OR 97013


You can friend us on Facebook too!

One of the reason I love to put on this show is that all of the vendors sell ONLY homemade crafts, gifts, decor and food! We have everything from scarves to caramels, it is one stop shopping for sure. In past years I have had a booth as well as coordinating, but this year with a 2 year old running around (usually stealing my scissors!) it wasn't possible. To inspire you though, here are my favorite bazaar items I have sold in the past!

First is: Playdough!


You can make your own playdough by following this recipe:
Basic ingredient ratios:
1 cups flour
1 cups warm water
1/2 cup salt
1 Tablespoons vegetable oil
1/2 Tablespoon cream of tartar (optional for improved elasticity)
for color and a bit of scent add 1 package of Kool Aid of your choice!
Put everything in a pan over medium heat. Stir until it forms a ball. Transfer to waxed paper to cool. Once cool enough to handle knead until smooth.

Package in your favorite little containers, the small containers are perfect to take to restaurants to keep little hands busy while waiting for food.

Take that recipe and package up the dry ingredients with a package of Kool Aid, and you have a great do it yourself gift too! Make sure to include directions.

Last is Reindeer food. I layered green and red sprinkles with oats in a clean baby food container. These are super cute and the kids love them. We made this one of our traditions and sprinkle them on the lawn before they go down for bed on Christmas Eve.

What is your favorite items to find at bazaars?


Linking to these great parties:
Sew WoodsyI Heart Nap TimePhotobucketTip Junkie handmade projects
”Creations

Monday, October 31, 2011

Halloween Day

Just a quick post, it is noon and we have already been out to trick or treat at Grandma's work. Followed by picking up our annual jack-o-lantern pizza! I think the costumes are stinkin' cute!


Happy Halloween!

Thursday, October 27, 2011

Chocolate Chip Cookie gifts

Before I start talking about giving gifts, looky what my friend Margaret gave me?!

I am covering the title of my book out of shame. My guilty pleasures are those vampire/mythological romance book... don't judge! You can find more Margaret's creations on her Etsy page. My favorite are the coasters!

Now onto the yummy Chocolate Chip Cookies! You can't really make a bad chocolate chip cookie so use whatever recipe you like. I used Tide and Thyme (dot) Com's recipe. I ran out of flour so added an extra cup of bread flour to mine. They held the shape of the scoop when the first batch was done, so in the following I used the back of the scoop to flatten them.


These are for my son's Fall Harvest Dance at his school. I assume they will be used for the cake walk. I am sure everyone is making cupcakes (which is not a bad thing, too many cupcakes? NEVER!), so I wanted to do something different. I added them to a plastic baggy and got out my cuddle bug for the first time in months!

Using my Sizzix die I cut out the top note in both patterned scrap paper and a harder card stock. The letters were punched out of black card stock. I used my favorite tool, a glue pen, to adhere the letters onto the top note. Then I stapled a folded top note onto the bag.


These would make perfect additions to your boo bags too! Let me know what you think, and do you have any guilty pleasures?
Posting to these great link parties:

Tuesday, October 25, 2011

DIY Zombie Costume

Are you as addicted to Iphone and Ipad games as I am? I think the only people addicted more is my children. From learning games to their absolute favorite Plants VS Zombies we spend hours a week playing.

Plants VS Zombies is a battle game where the zombies (all different types and skill levels) are trying to get into your house and "EAT YOUR BRAINS!", you need to defend your yard by planting plants that shoot or blow up the zombies.
Photo from http://www.wired.com/gamelife/2009/05/plants-vs-zombies/

For Halloween Gabe decided he would be the bucket head style zombie from the game, so off to Goodwill we went. I am extremely happy with how it turned out!
Photo from http://plantsvszombies.wikia.com/wiki/File:1769836-zombie_buckethead.png
And here is Gabe:

Roland will be a skeleton but his was from the store, hopefully next year he gives me a more interesting costume to put together!

Linking to these great parties:

Tuesday, October 18, 2011

Fall Leaf Banner

The leaves are finally starting to change in Canby, my favorite time of year. This is the perfect time to take a nature walk and start making those projects with whatever you find outside. I was inspired by one of my favorite muses, Kids Craft Weekly. You can receive her newsletters by email monthly. This last month we created the Fall Leaf Banner. It takes several steps to complete it is well worth it.

Fall Leaf Banner:


If you are making this when the leaves have dropped take this opportunity to go out on a nature walk and find different varieties of leaves to trace onto news paper. We are lucky enough to have a nature trail right behind our house!


After you have traced several leaves on the newspaper let the kids water color, don't worry about staying in the lines you will cut them out later. We did this last month so I found some free printable leaf pictures and printed them directly onto the newspaper.

When the water color is dry cut out all of the leaves. Paint a white background on another piece of newspaper. Place the cut out leaves onto the paint.

For the finishing touches I chose to punch out hearts and glue in the corner. Punch a hole in the middle of each heart and tie your ribbon, string or raffia.
We hung this above our entry table, just don't tell my husband I put push pins in the wall!

This is one of my favorite projects thus far and am going to make sure I figure out a way to store this nicely for next year. Will you be trying this? Let me know!

Linking to these great sites:

Blue Cricket DesignThe Girl CreativePhotobucket Keeping It SimpleTip Junkie handmade projects TGC Blogiversary Celebration
”Creations
DIY under $5Photobucket